How to Fail Successfully
Even though I have been painting for many decades, there are still days when the work does not go well, but experience has taught me a few tricks that help me to turn failure into success…
As I write in mid-February, the UK has been subject to many weeks of unceasing rain. Last Saturday was the first day of sunshine we had had for a long time, so I eagerly dashed out into our garden to paint en plein air. I had an idea to paint the early spring plants close-up, as I love painting foliage and flowers and we have some beautiful hellebores and snowdrops in our spring borders.
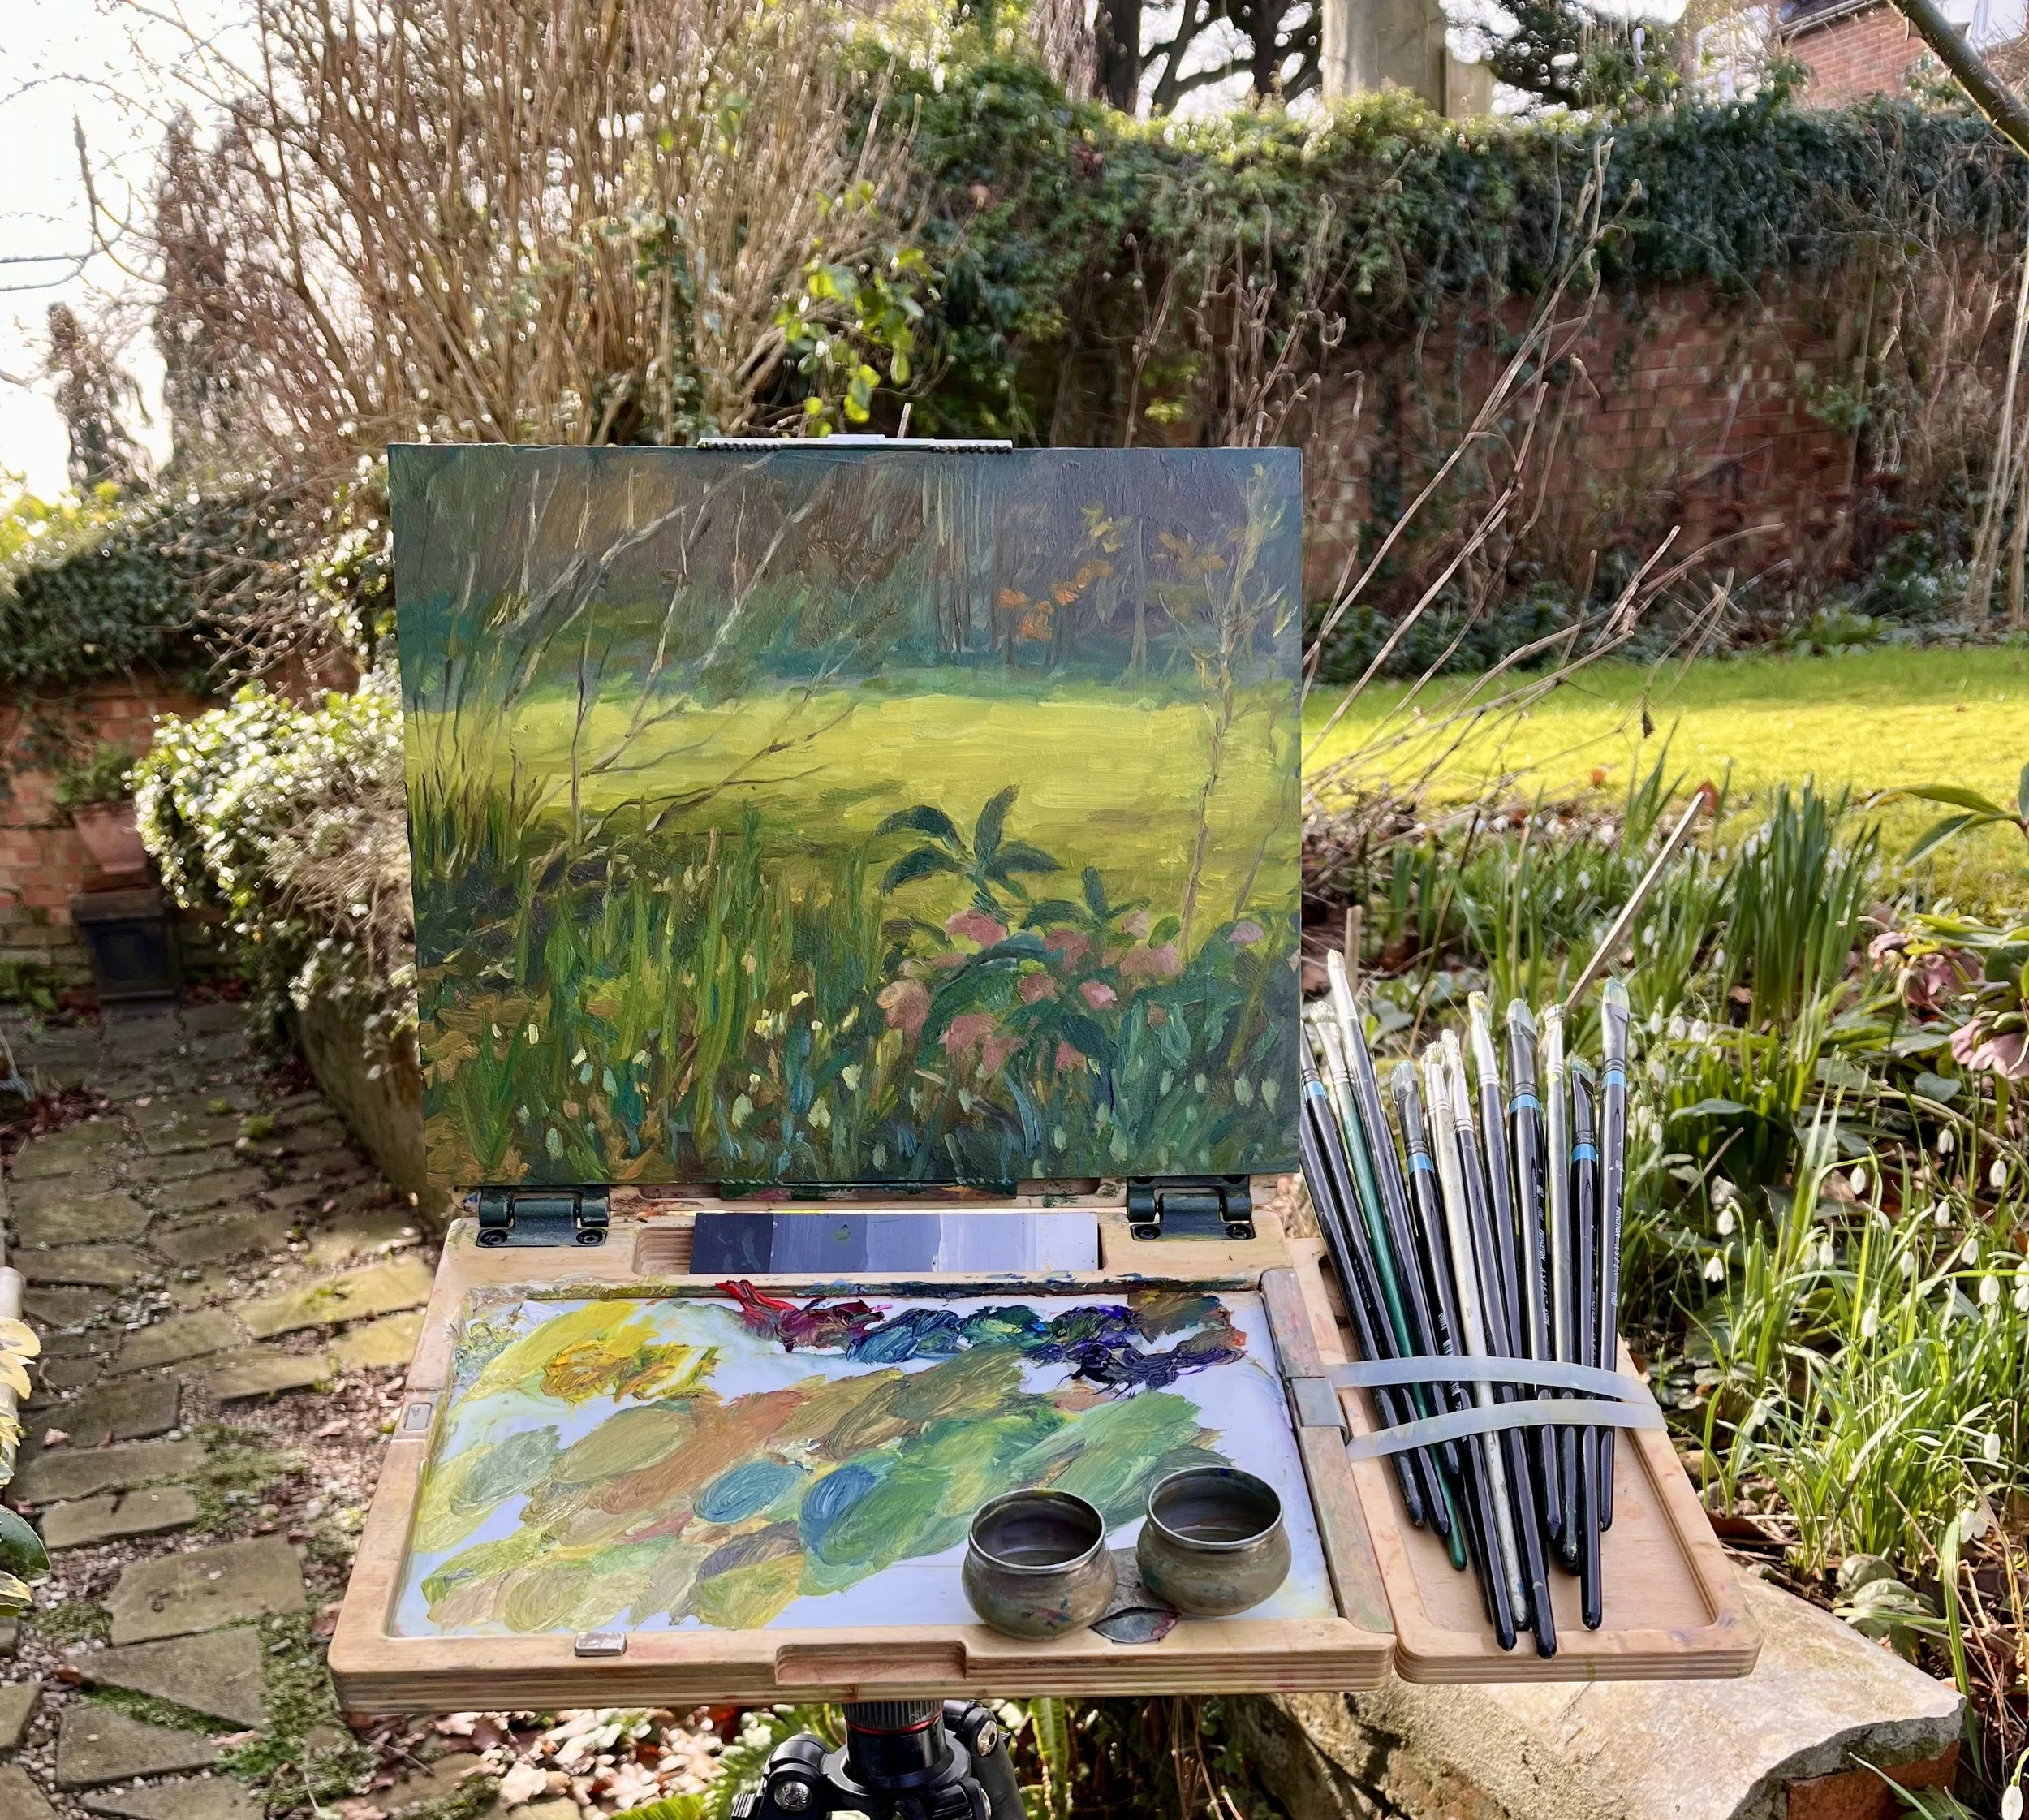
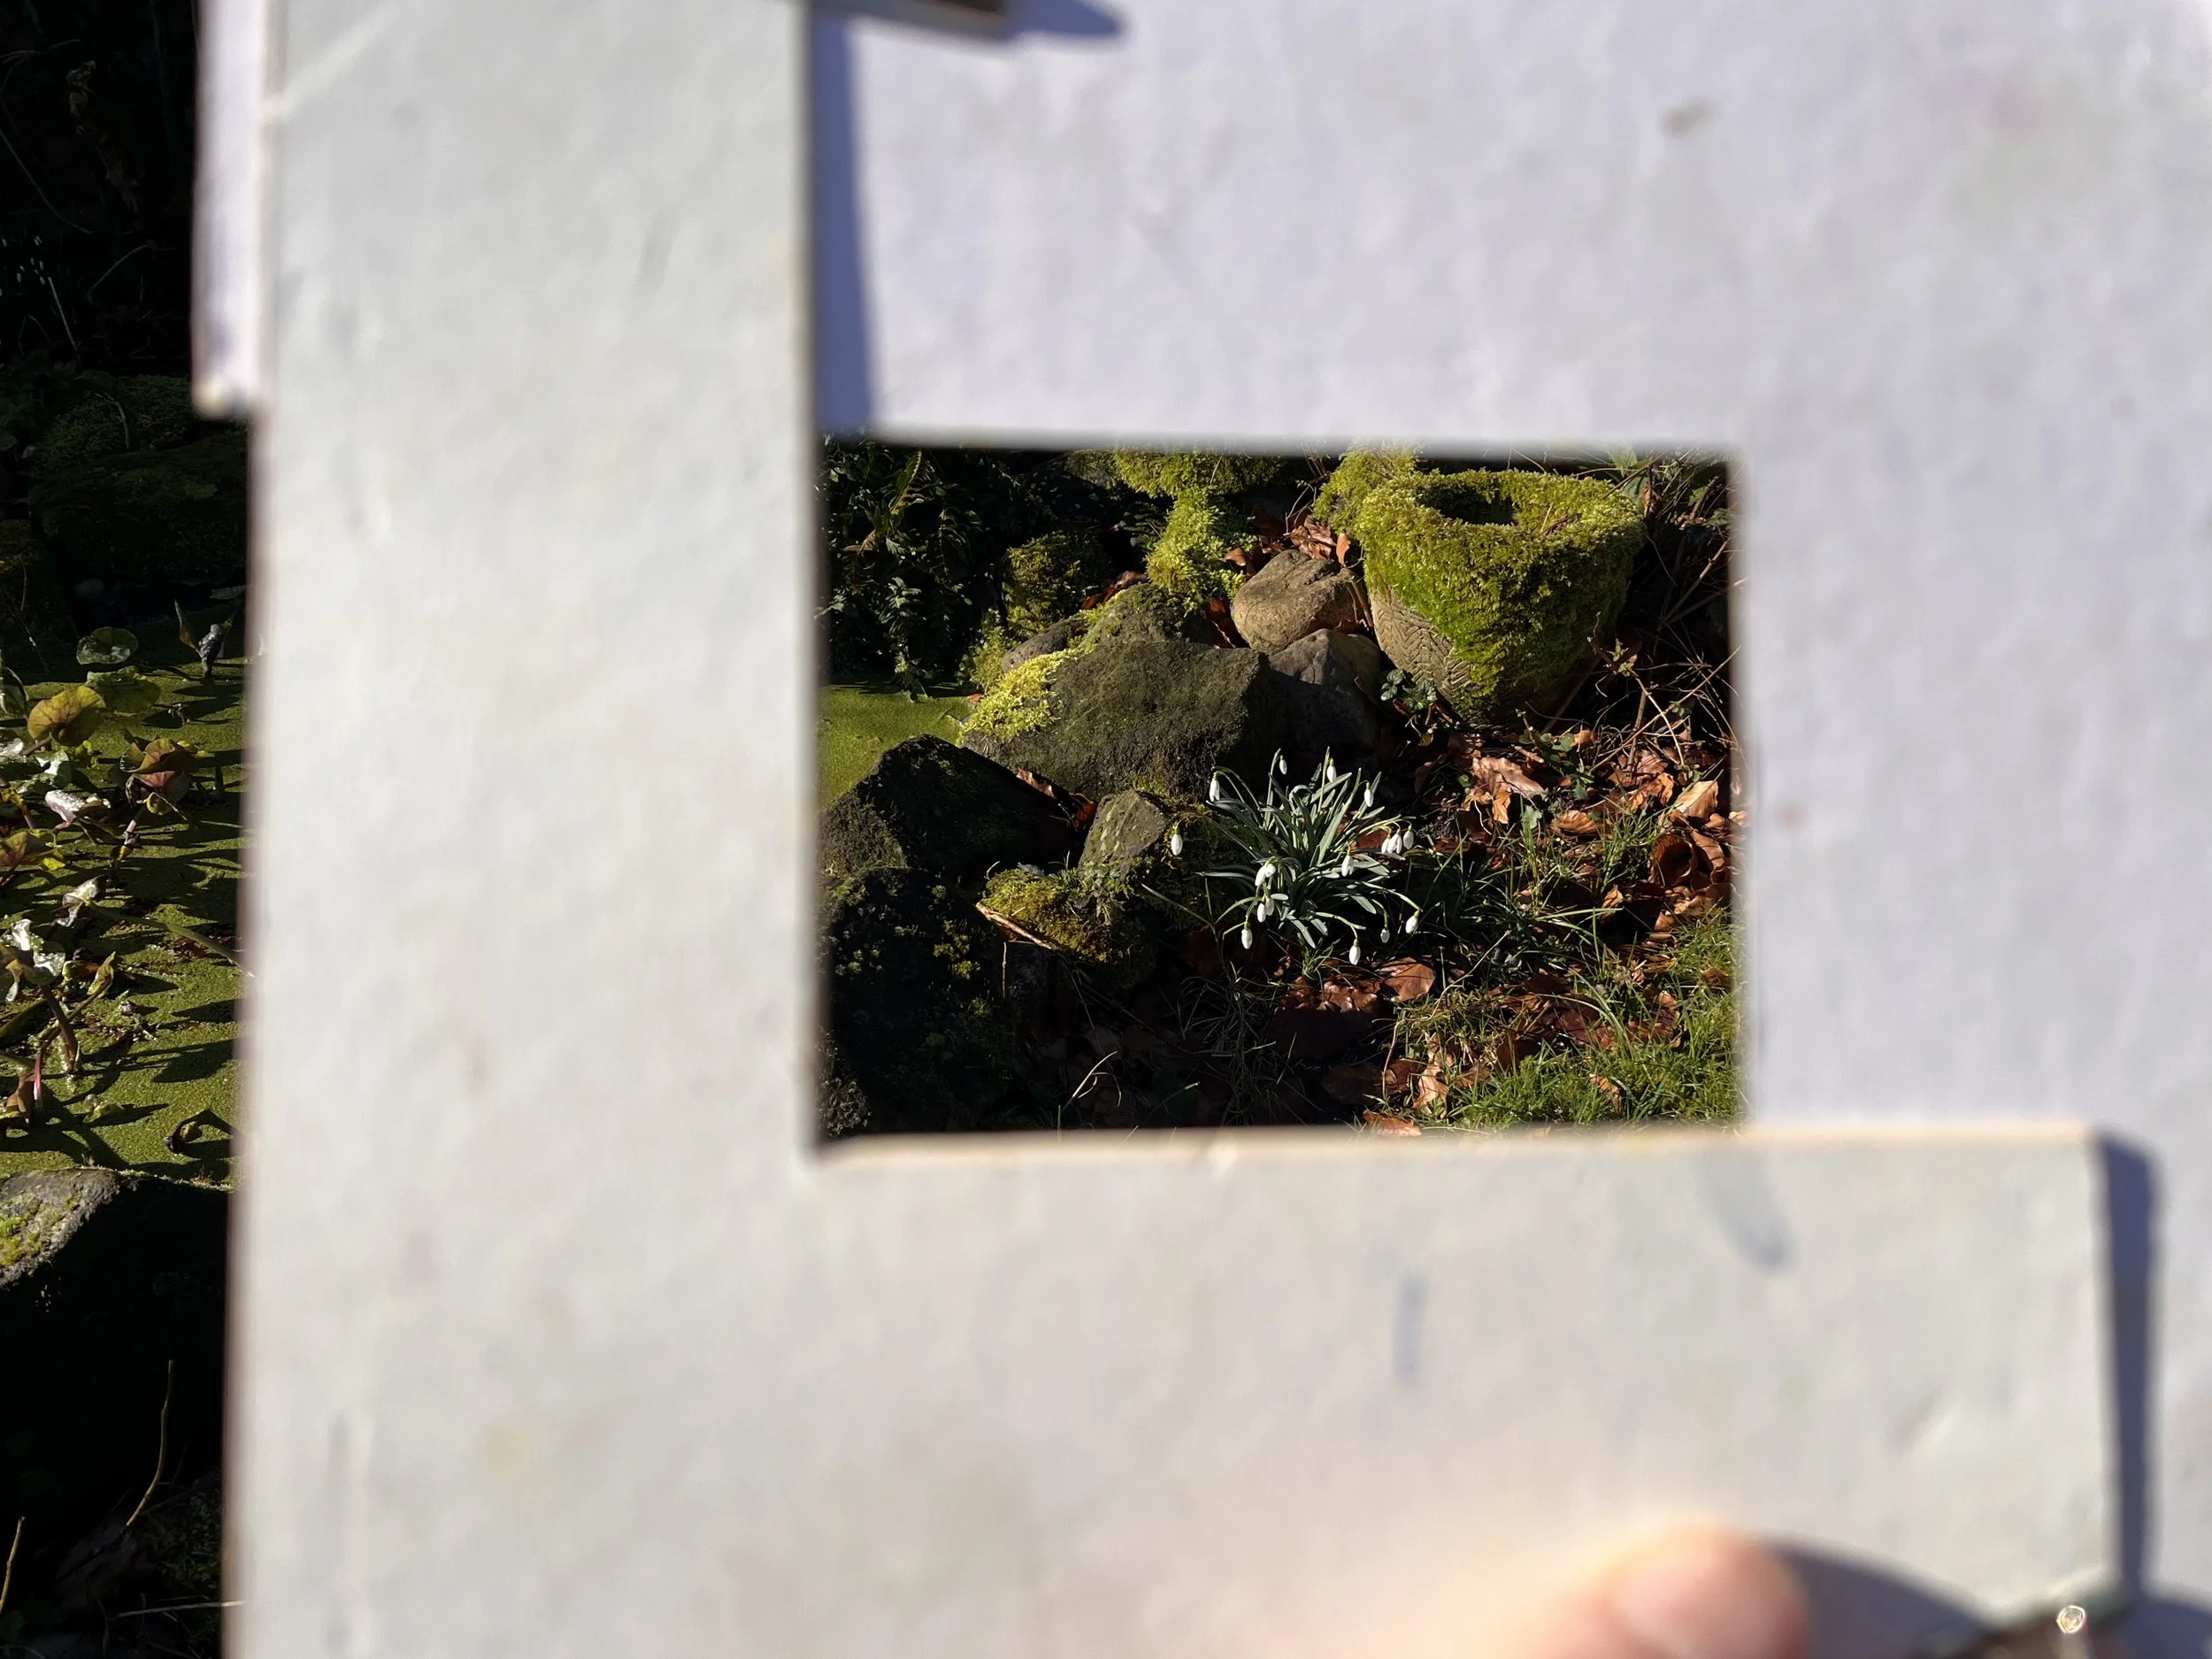
However, I immediately ran into the first trap of the plein air painter – I couldn’t decide what to paint! Everything looked so beautiful with the clear, low sunlight glancing across the bright lime-coloured mossy rocks and lawn, the red-brown of dry seed heads and the fresh greens, whites and pinks of the spring plants. I wanted to paint it all but settled on a small area of mossy rocks beside the pond and a little clump of snowdrops partly in their shade. I used a simple viewfinder to isolate the subject area, but I didn’t do any thumbnail sketches.
I worked on this for a good hour or so, sitting on a garden bench so that I was close to the subject. I wanted the focus to be on the snowdrops and that glancing sunlight, but I couldn’t resist getting involved with the bright green moss on the rocks beside the pond, I should have heard the alarm bells ringing at this point.
My first painting of the day…
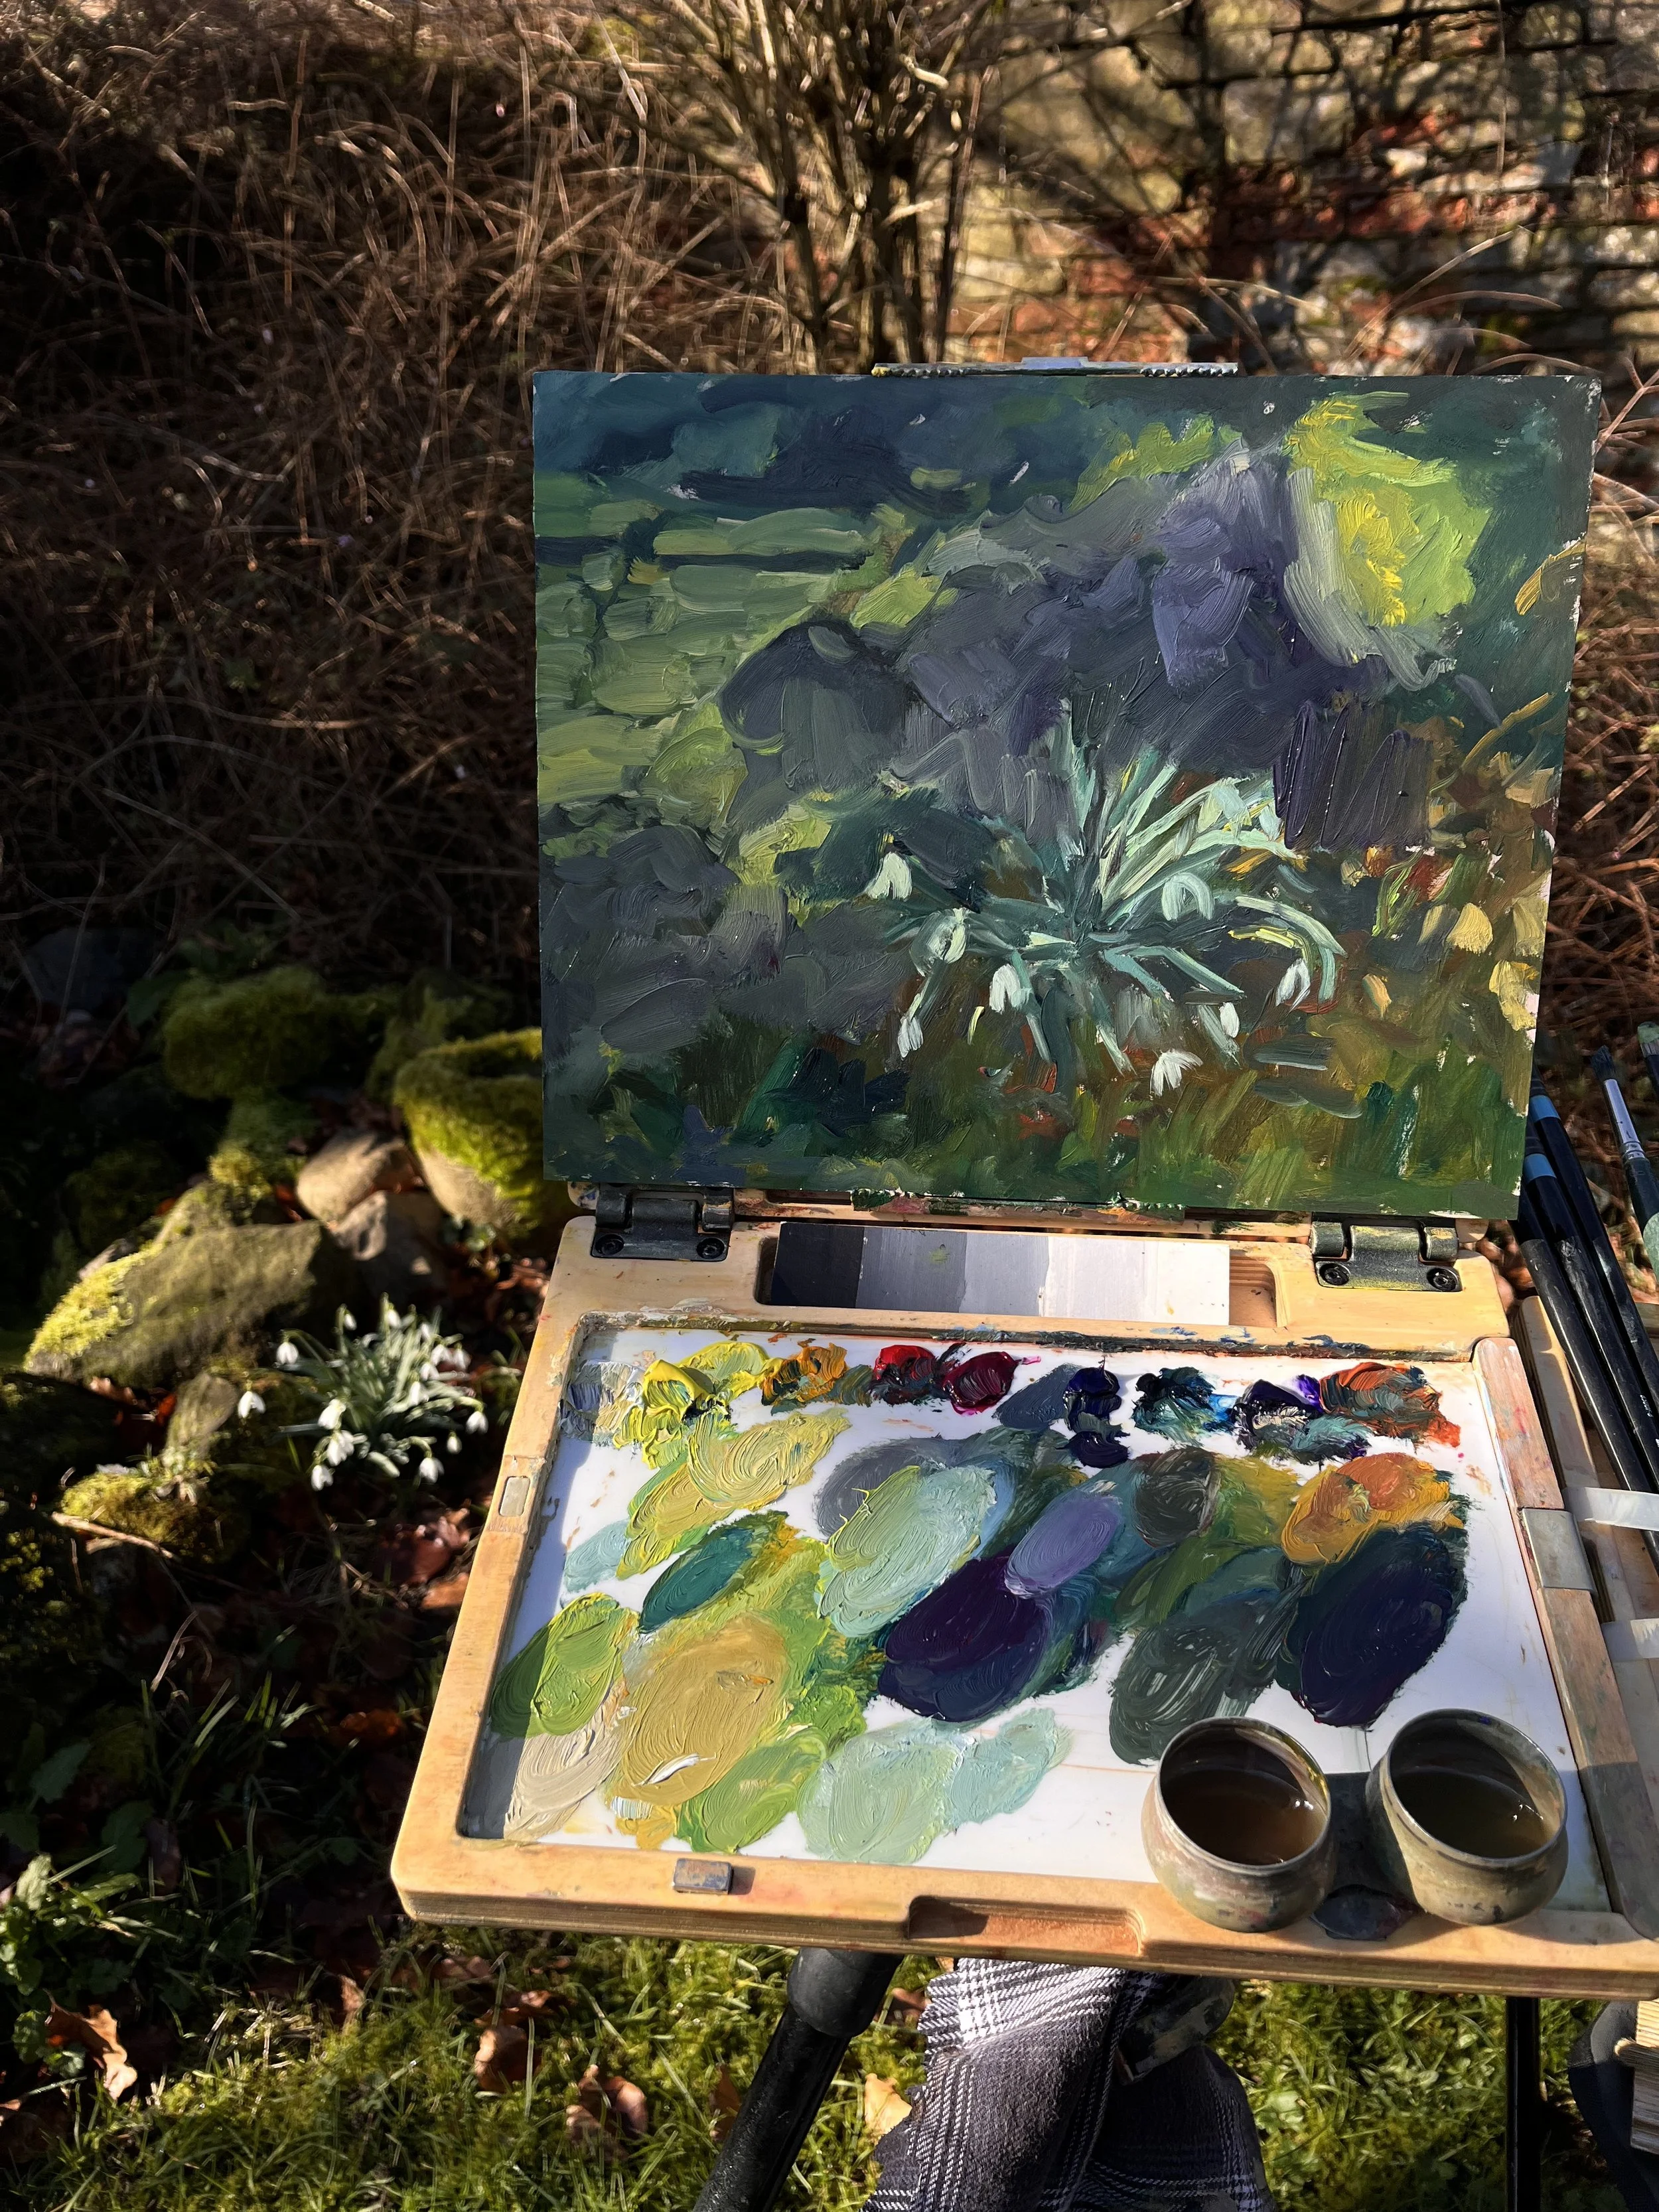
I think the reason this painting went wrong is because, being seated, I couldn’t easily and frequently stand back and check the work from a few feet away. This can really helps you to see the whole composition and any glaring problems (taking a photo helps too but it didn’t in this instance!)
Ideally with this impressionist style of painting, you simplify as much as you can so that the area of focus (the snowdrops in this case) can be developed with more tonal contrast, saturated colour and detailed brushwork to make it really eye catching. By the time I realized the painting wasn’t going well, the sun had moved some way across the scene and was very different from how I had first captured it. I decided to cut my losses and wiped this painting off and find a different subject.
A better spot…
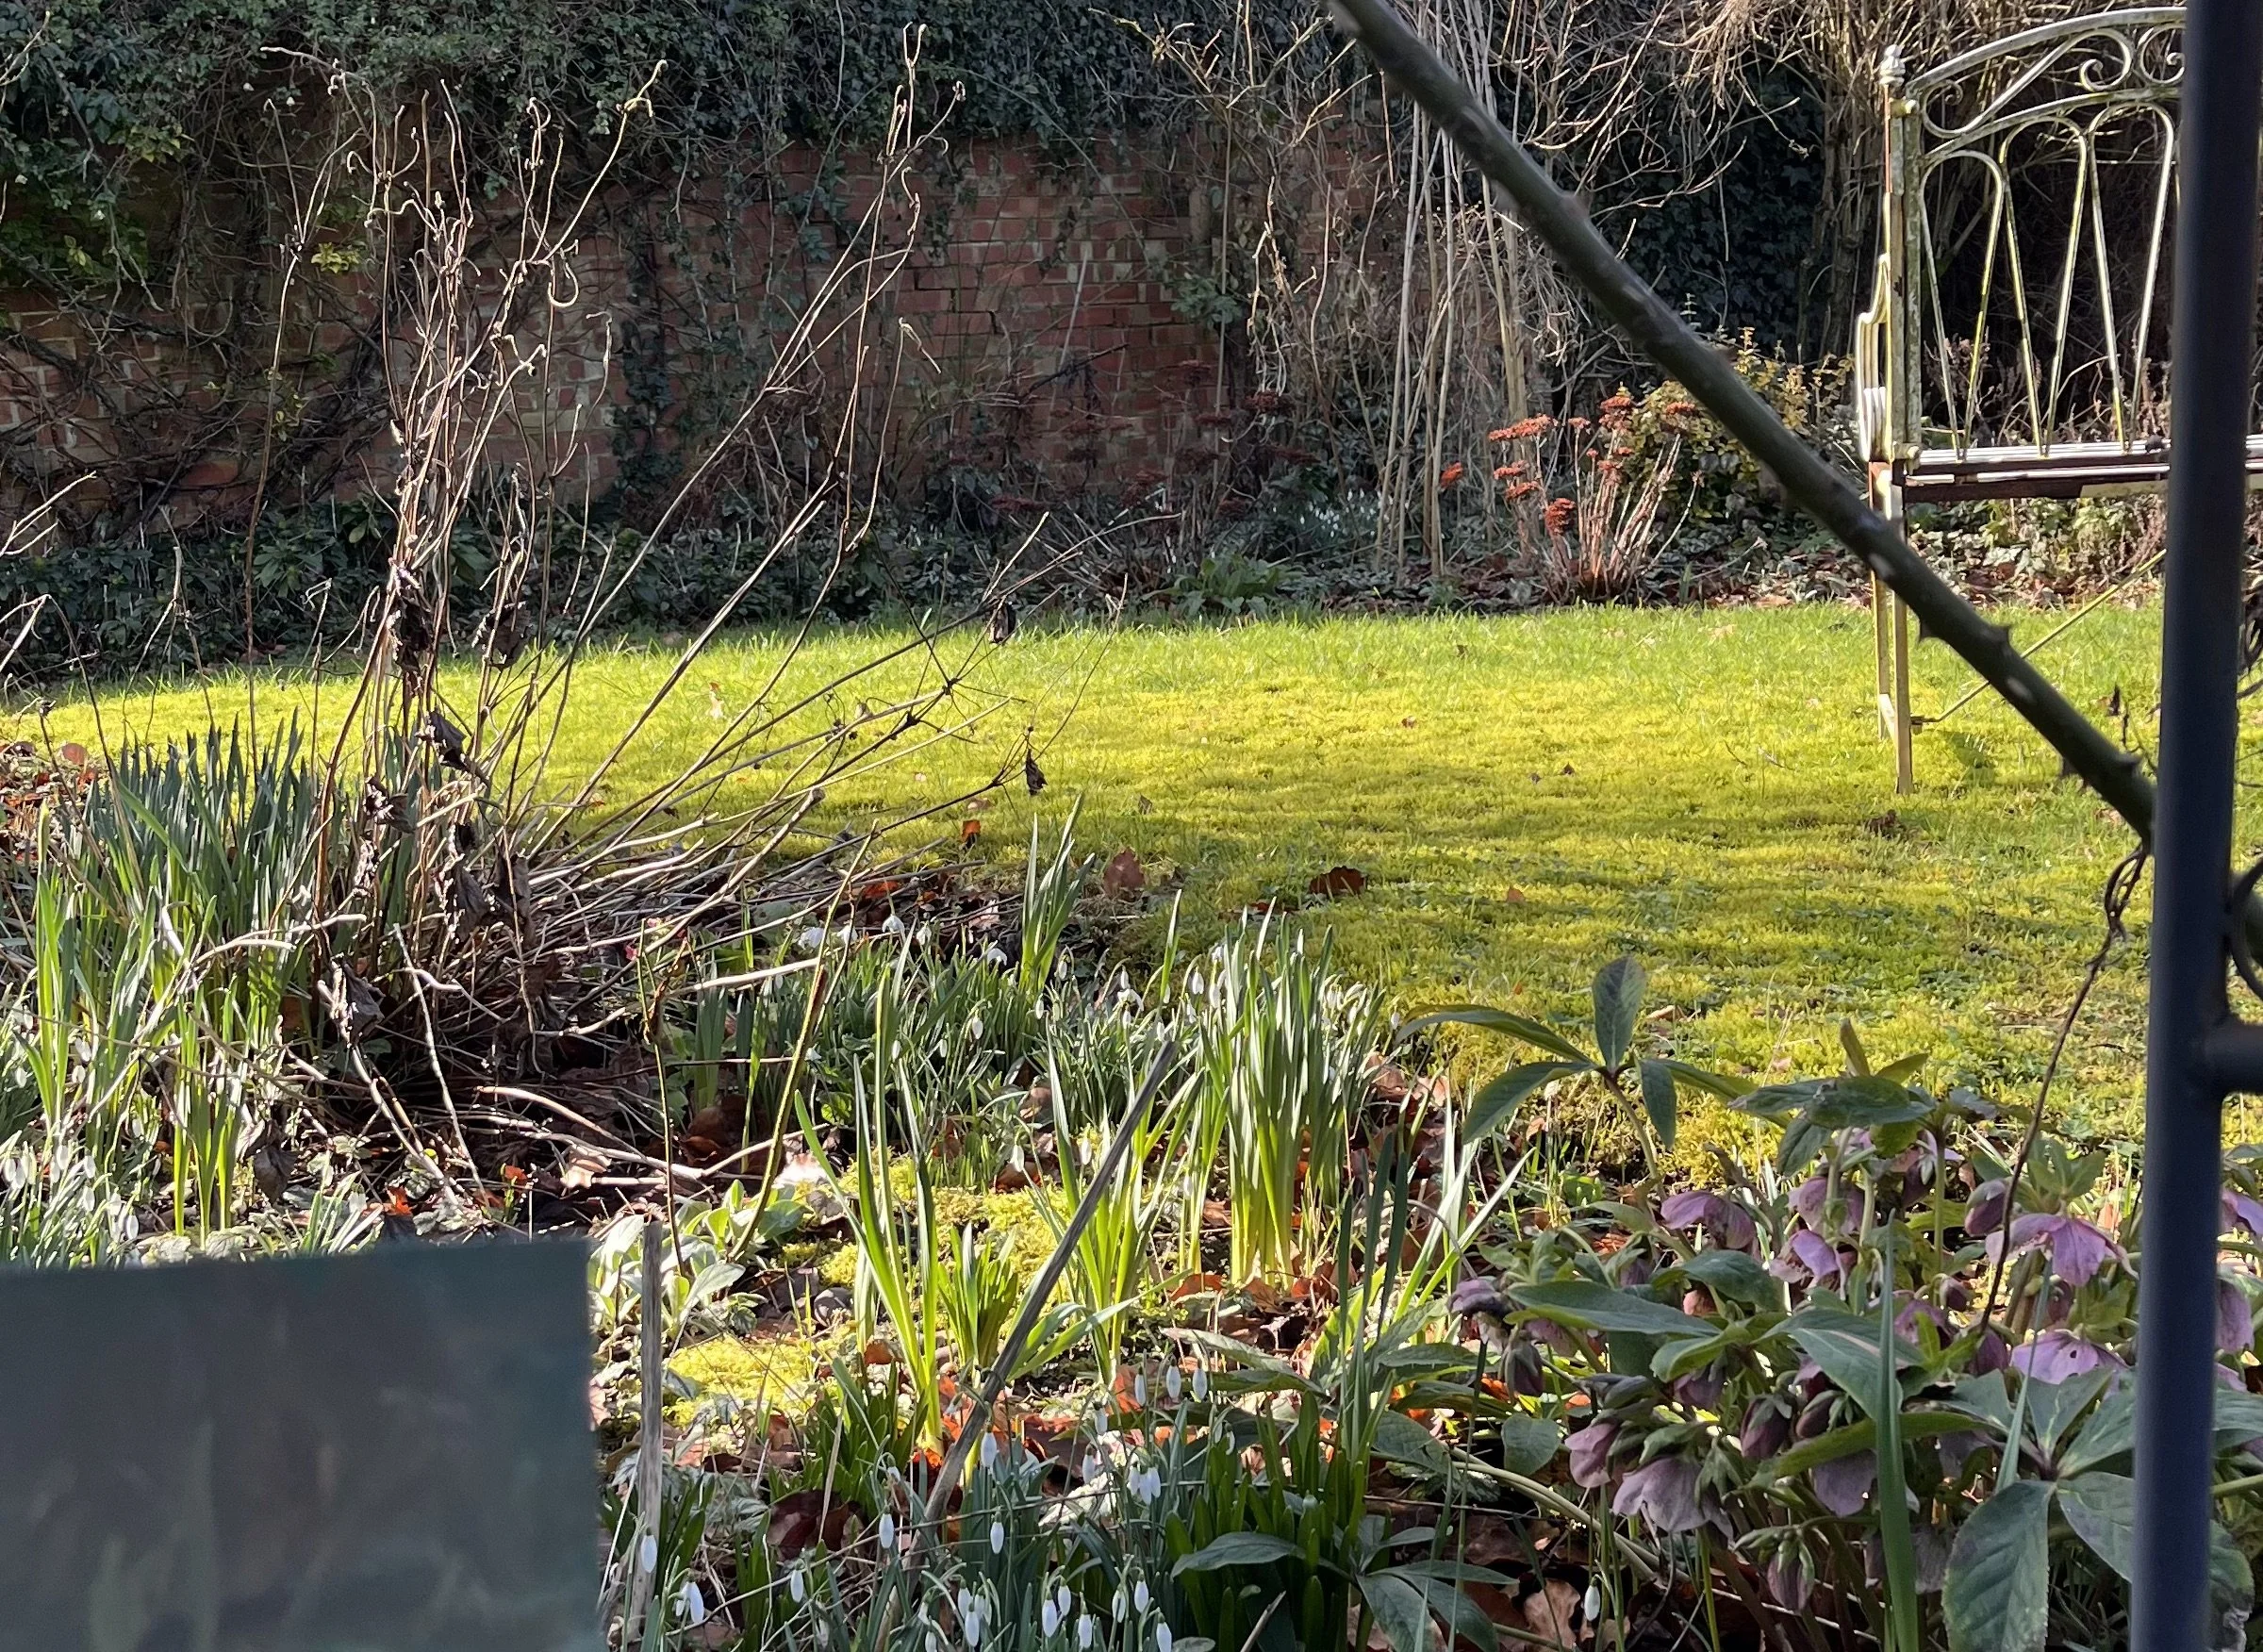
I relocated all my kit to a path at the back of our house that has a retaining wall on one side. This gave me a really close-up view of the plants in the border from a standing position.
Having lost time on the first painting I was now feeling even more rushed and really wanted to capture the patch of sunshine falling across the mossy lawn before the light changed.
Here’s what I like about this view:
· The way the foreground plants were cool and dark dark against the warm streak of light falling across the lawn
· The light catching the dry stalks on the left of the composition
· The warm colours of the dry sedums and pea sticks in the far border
· The foreground flowers and leaves in shade

And here’s what I painted
I wasn’t sure about this painting but needed to see it indoor and after a break, to see if I liked it or not. Later that day I spent time trying to work out what exactly it was that wasn’t working and what I might do to improve it. It is often the case that a difficult or unsatisfactory painting has a fundamental problem with the composition. This is why using a viewfinder and making thumbnail sketches before you start painting is such a good idea.

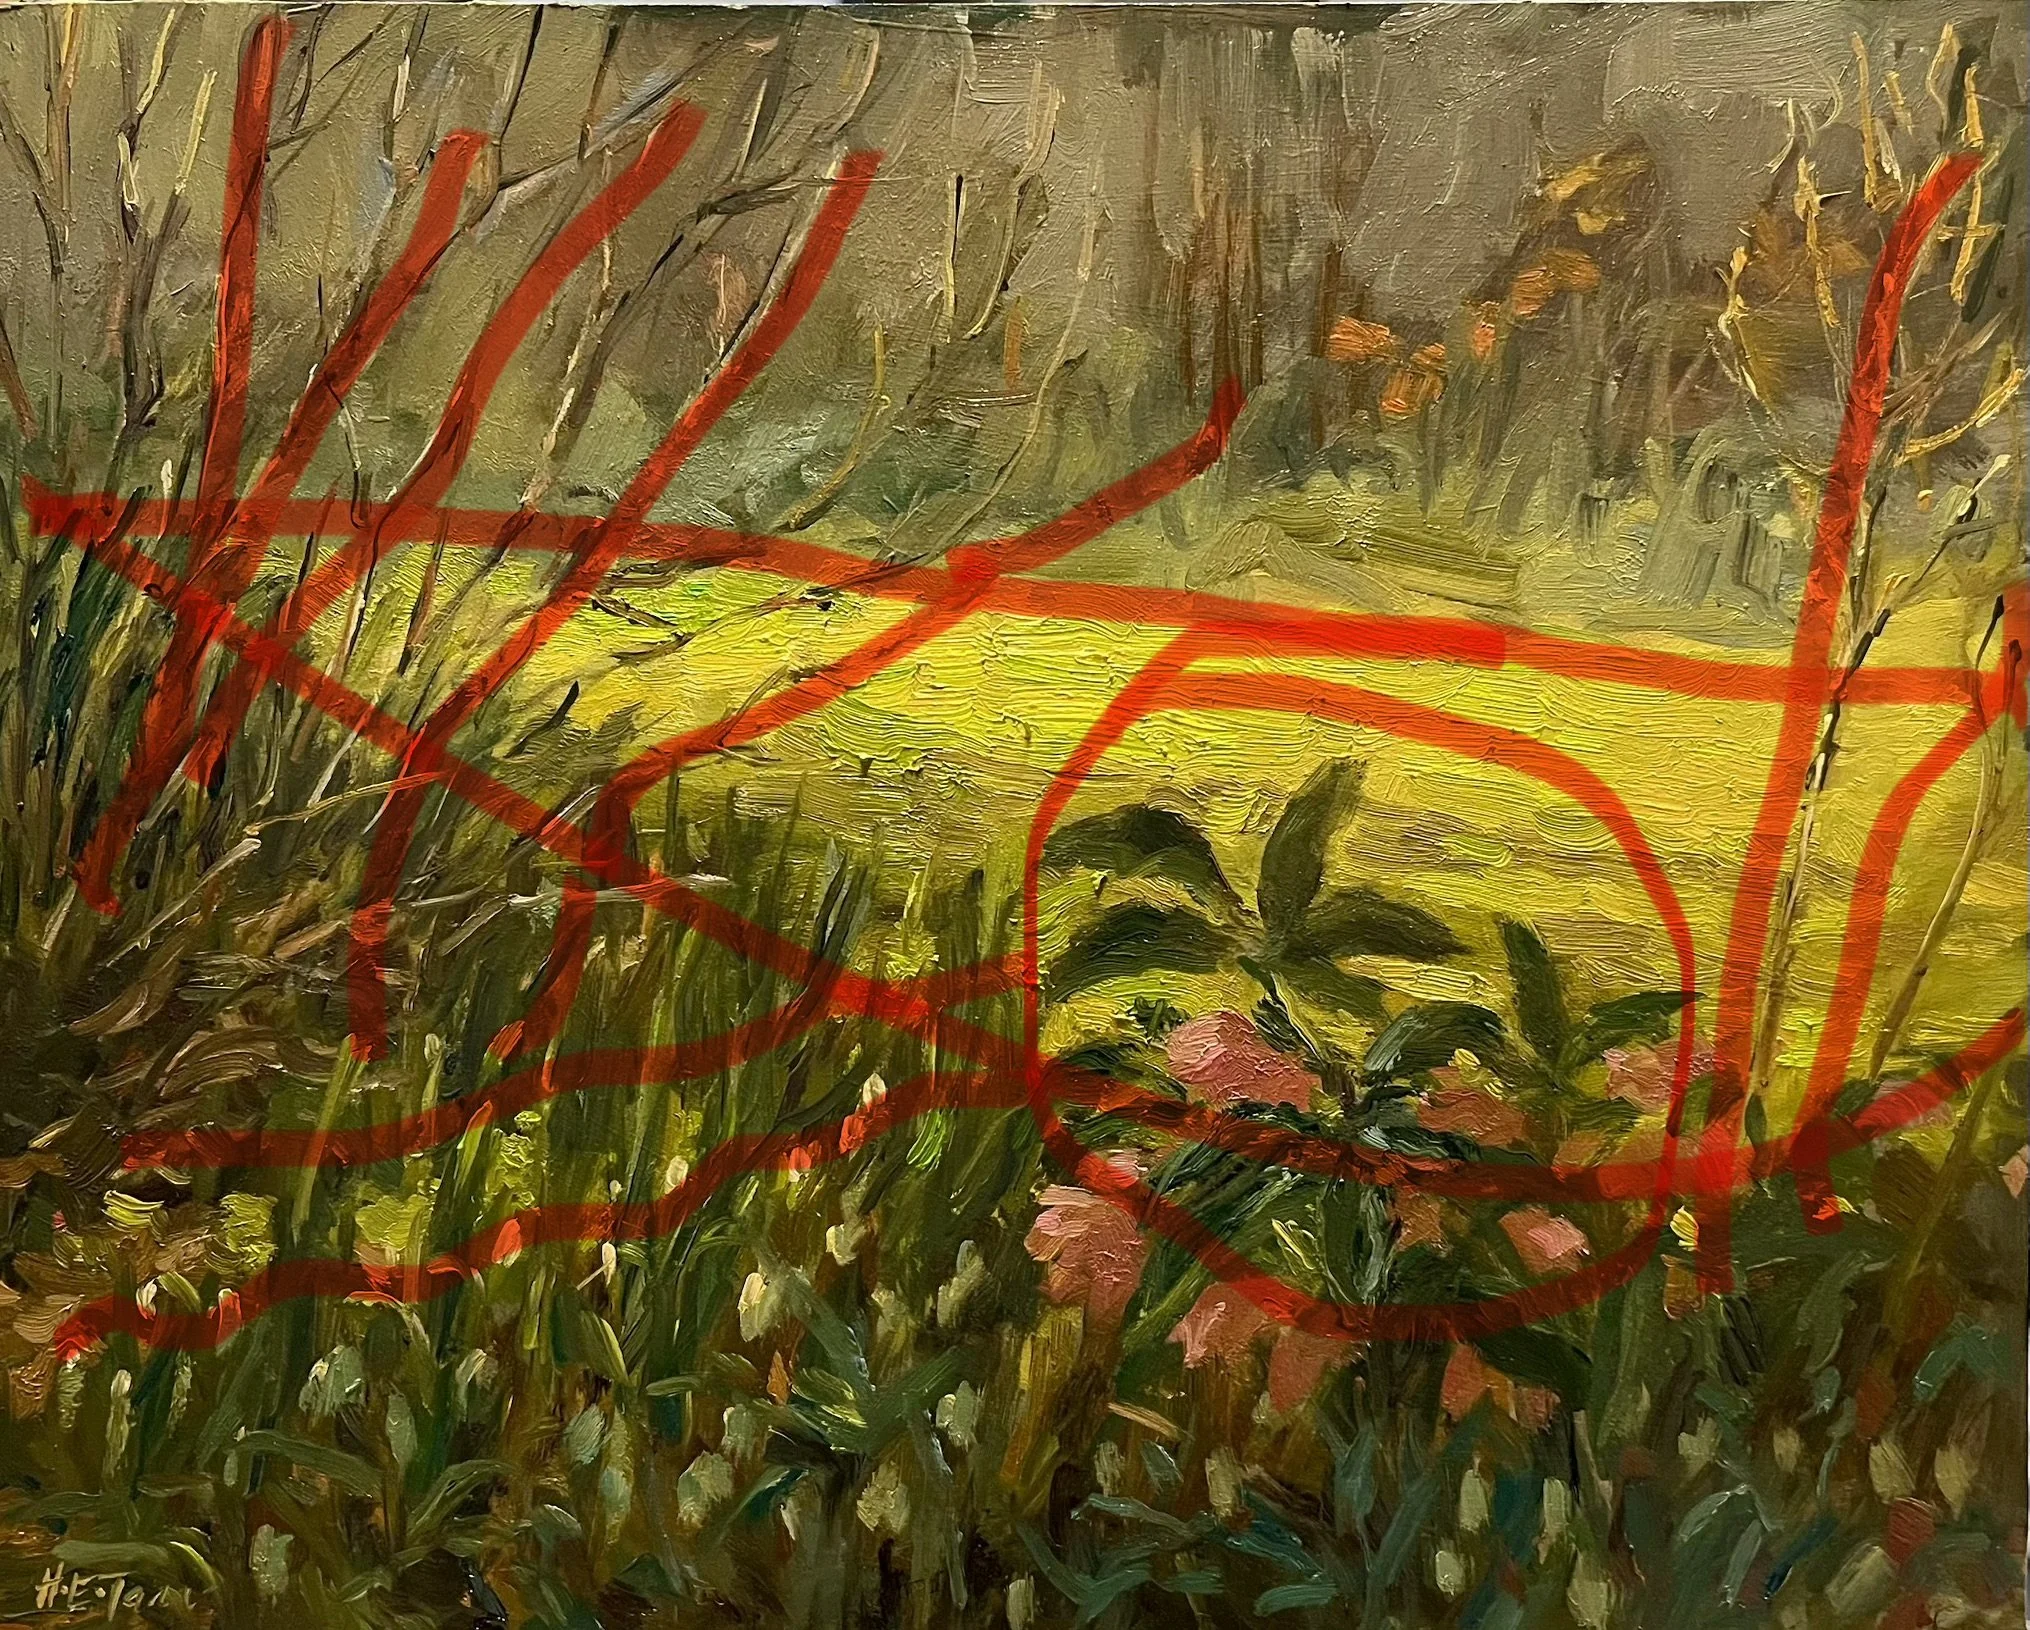
I decided the biggest problem was this composition…
Here are the problems I identified with the composition:
· The horizontal line of the foreground border crosses the middle of the painting, dissecting it into two equal halves
· The bright green of the sunlight on the grass accentuates this line further
· The line of the back border is also straight across the painting
· The tonal value of the top section of the painting is too dark in relation to the bright green, causing it to come forwards
· The foreground plants are too small – these were meant to be the focal point!
To test this theory I returned to the painting and made these changes
· I lightened the tonal value of the distant flower border to reduce the contrast with the sunlit lawn and create a feeling of depth
· I raised the left-hand side of the foreground to the two thirds line across the painting and lowered the right-hand side to the lower third line. This created a more dynamic triangle shape in the composition
· I also brought a streak of light in from the bottom left corner to help draw the viewers’ eye to the focal point, the hellebore plant in the lower right hand third of the painting
· Finally, I made more of the dry stalks, on the left and right-hand sides of the scene, as they visually connect the foreground to the background and frame the central area of the scene
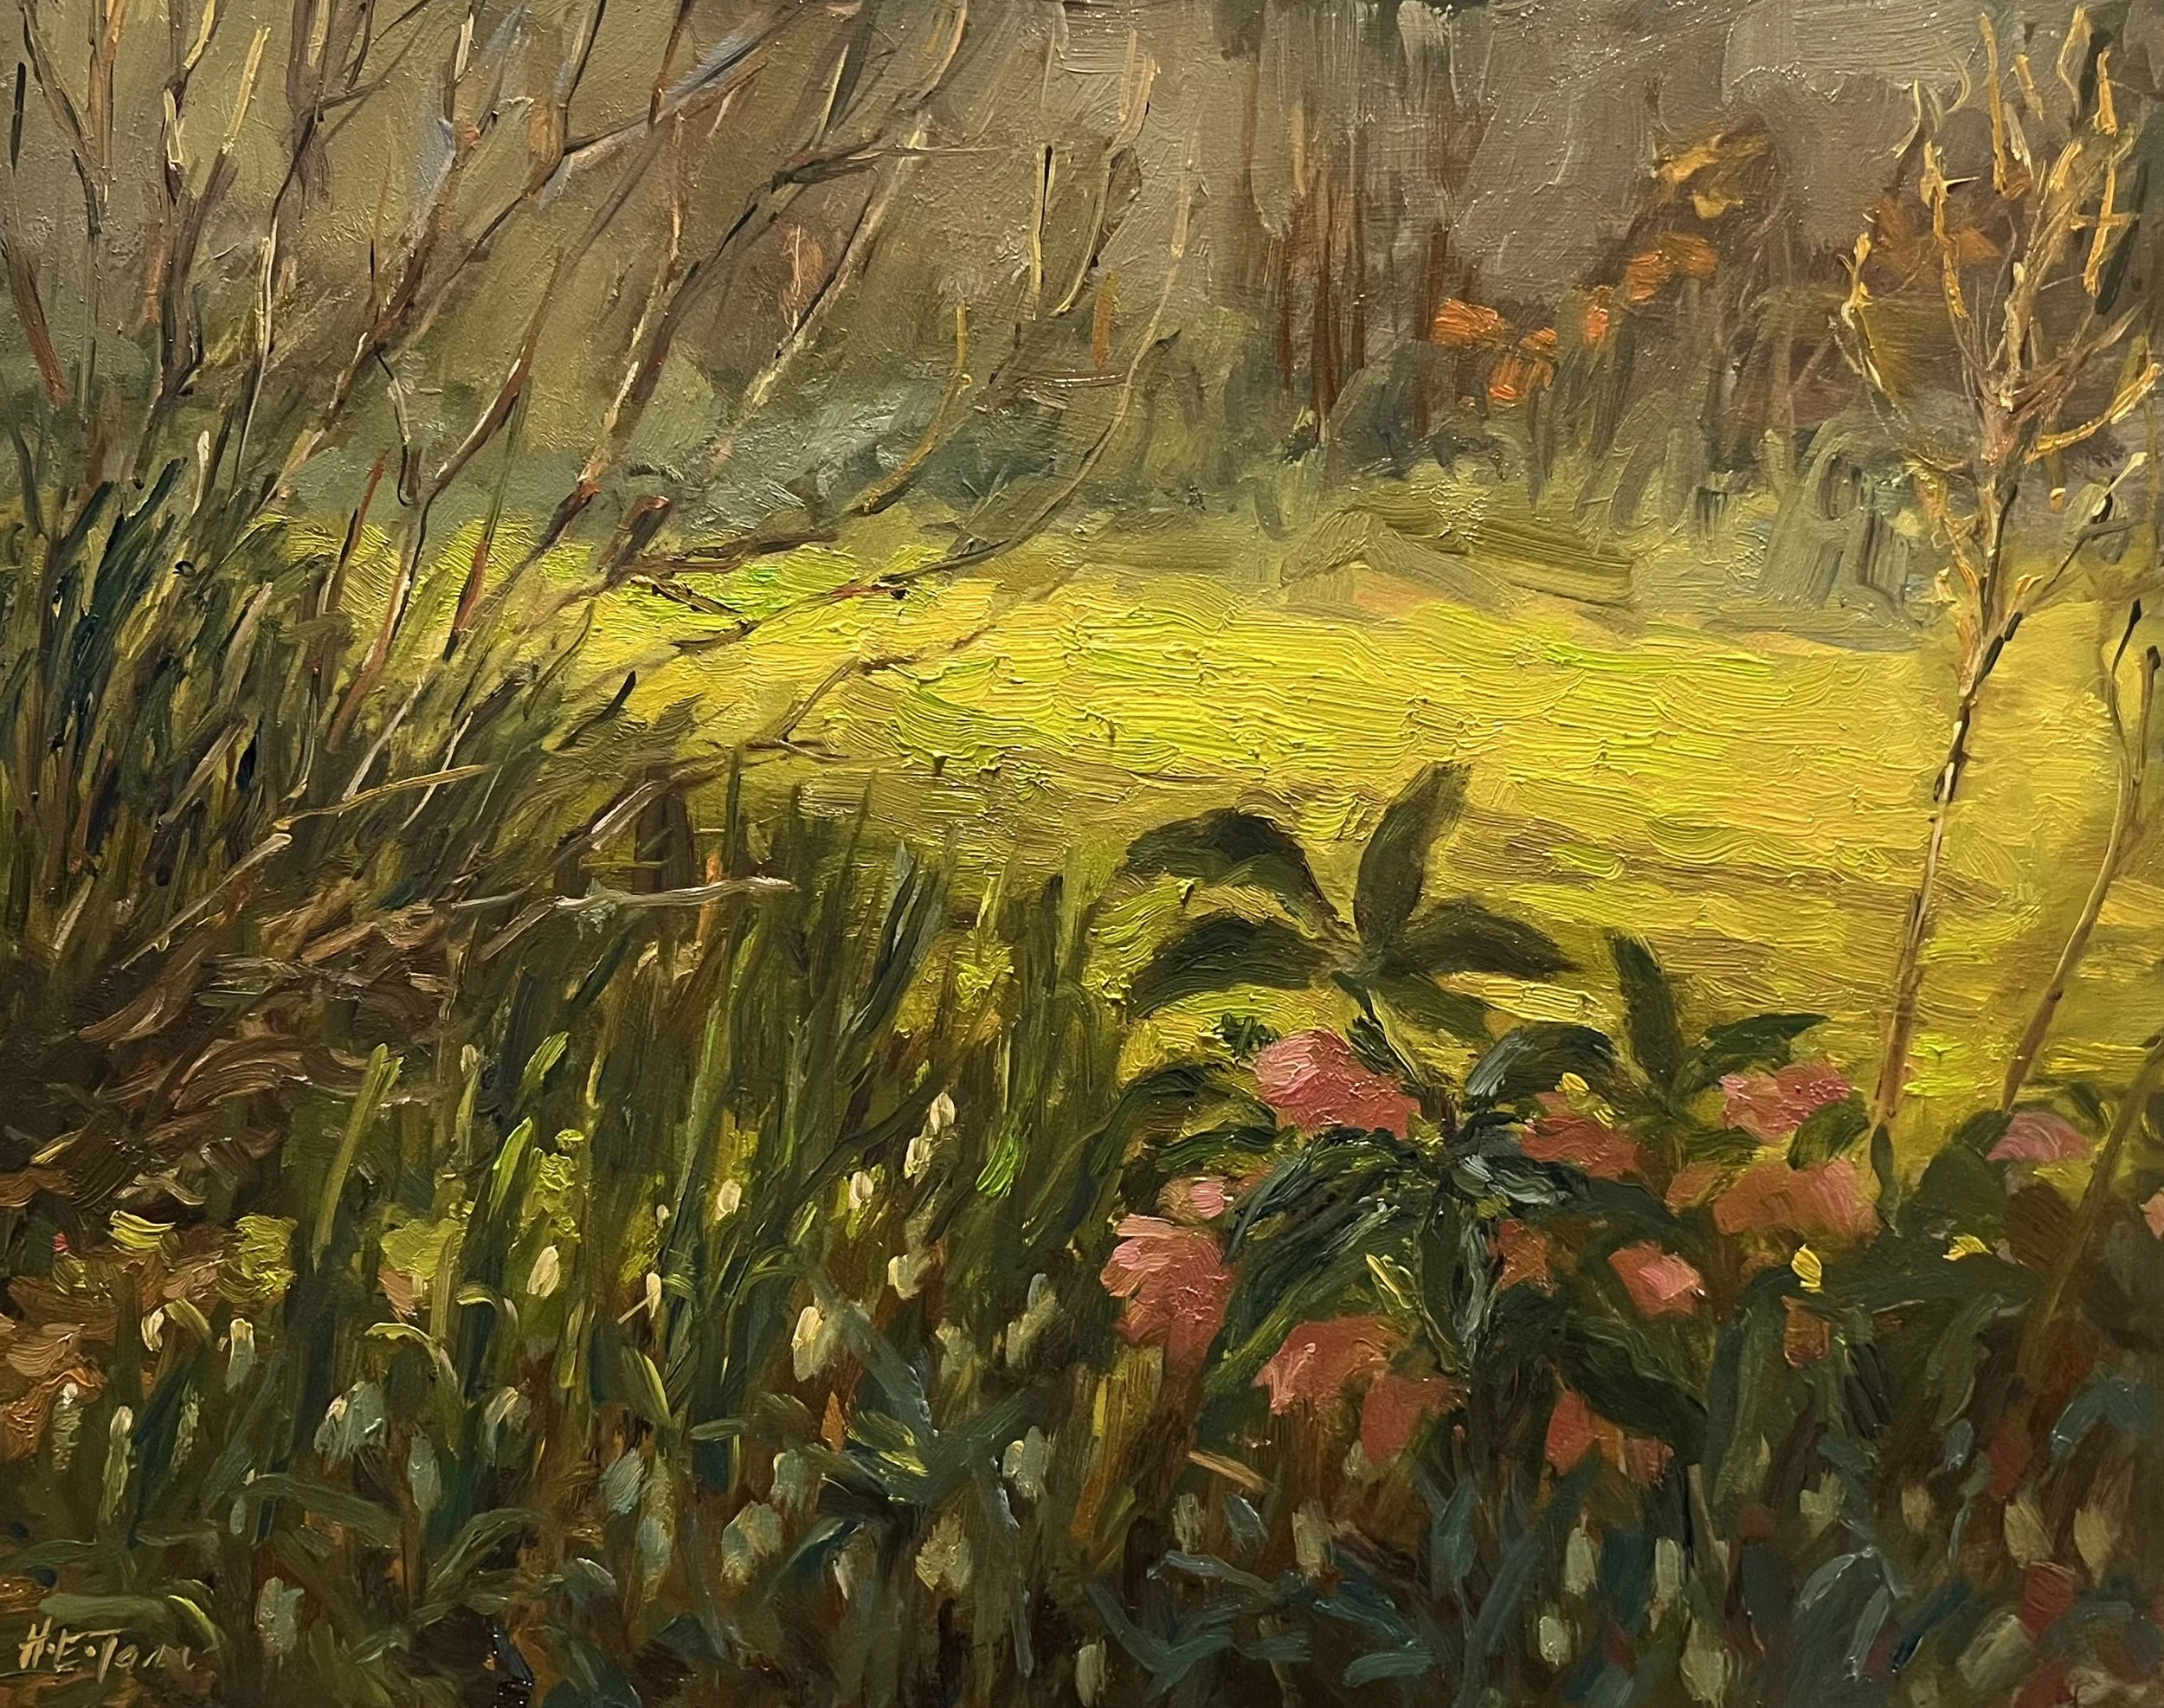
The altered painting
These changes did improve the painting and I almost thought I would keep it. I left the painting to one side and returned to it the next day to look at it more objectively and with fresh eyes. Unfortunately, it still didn’t impress me the next day, so I wiped the board clean. I have to love my paintings, second best or ‘OK’ just isn’t good enough, I know I can do better than this.
All is not lost though, I’ve made a short video about this whole process and it’s given me plenty to write about here too! Later that day I painted a small, brightly coloured study of tangerines in bowl and felt I had ended the day with a win.
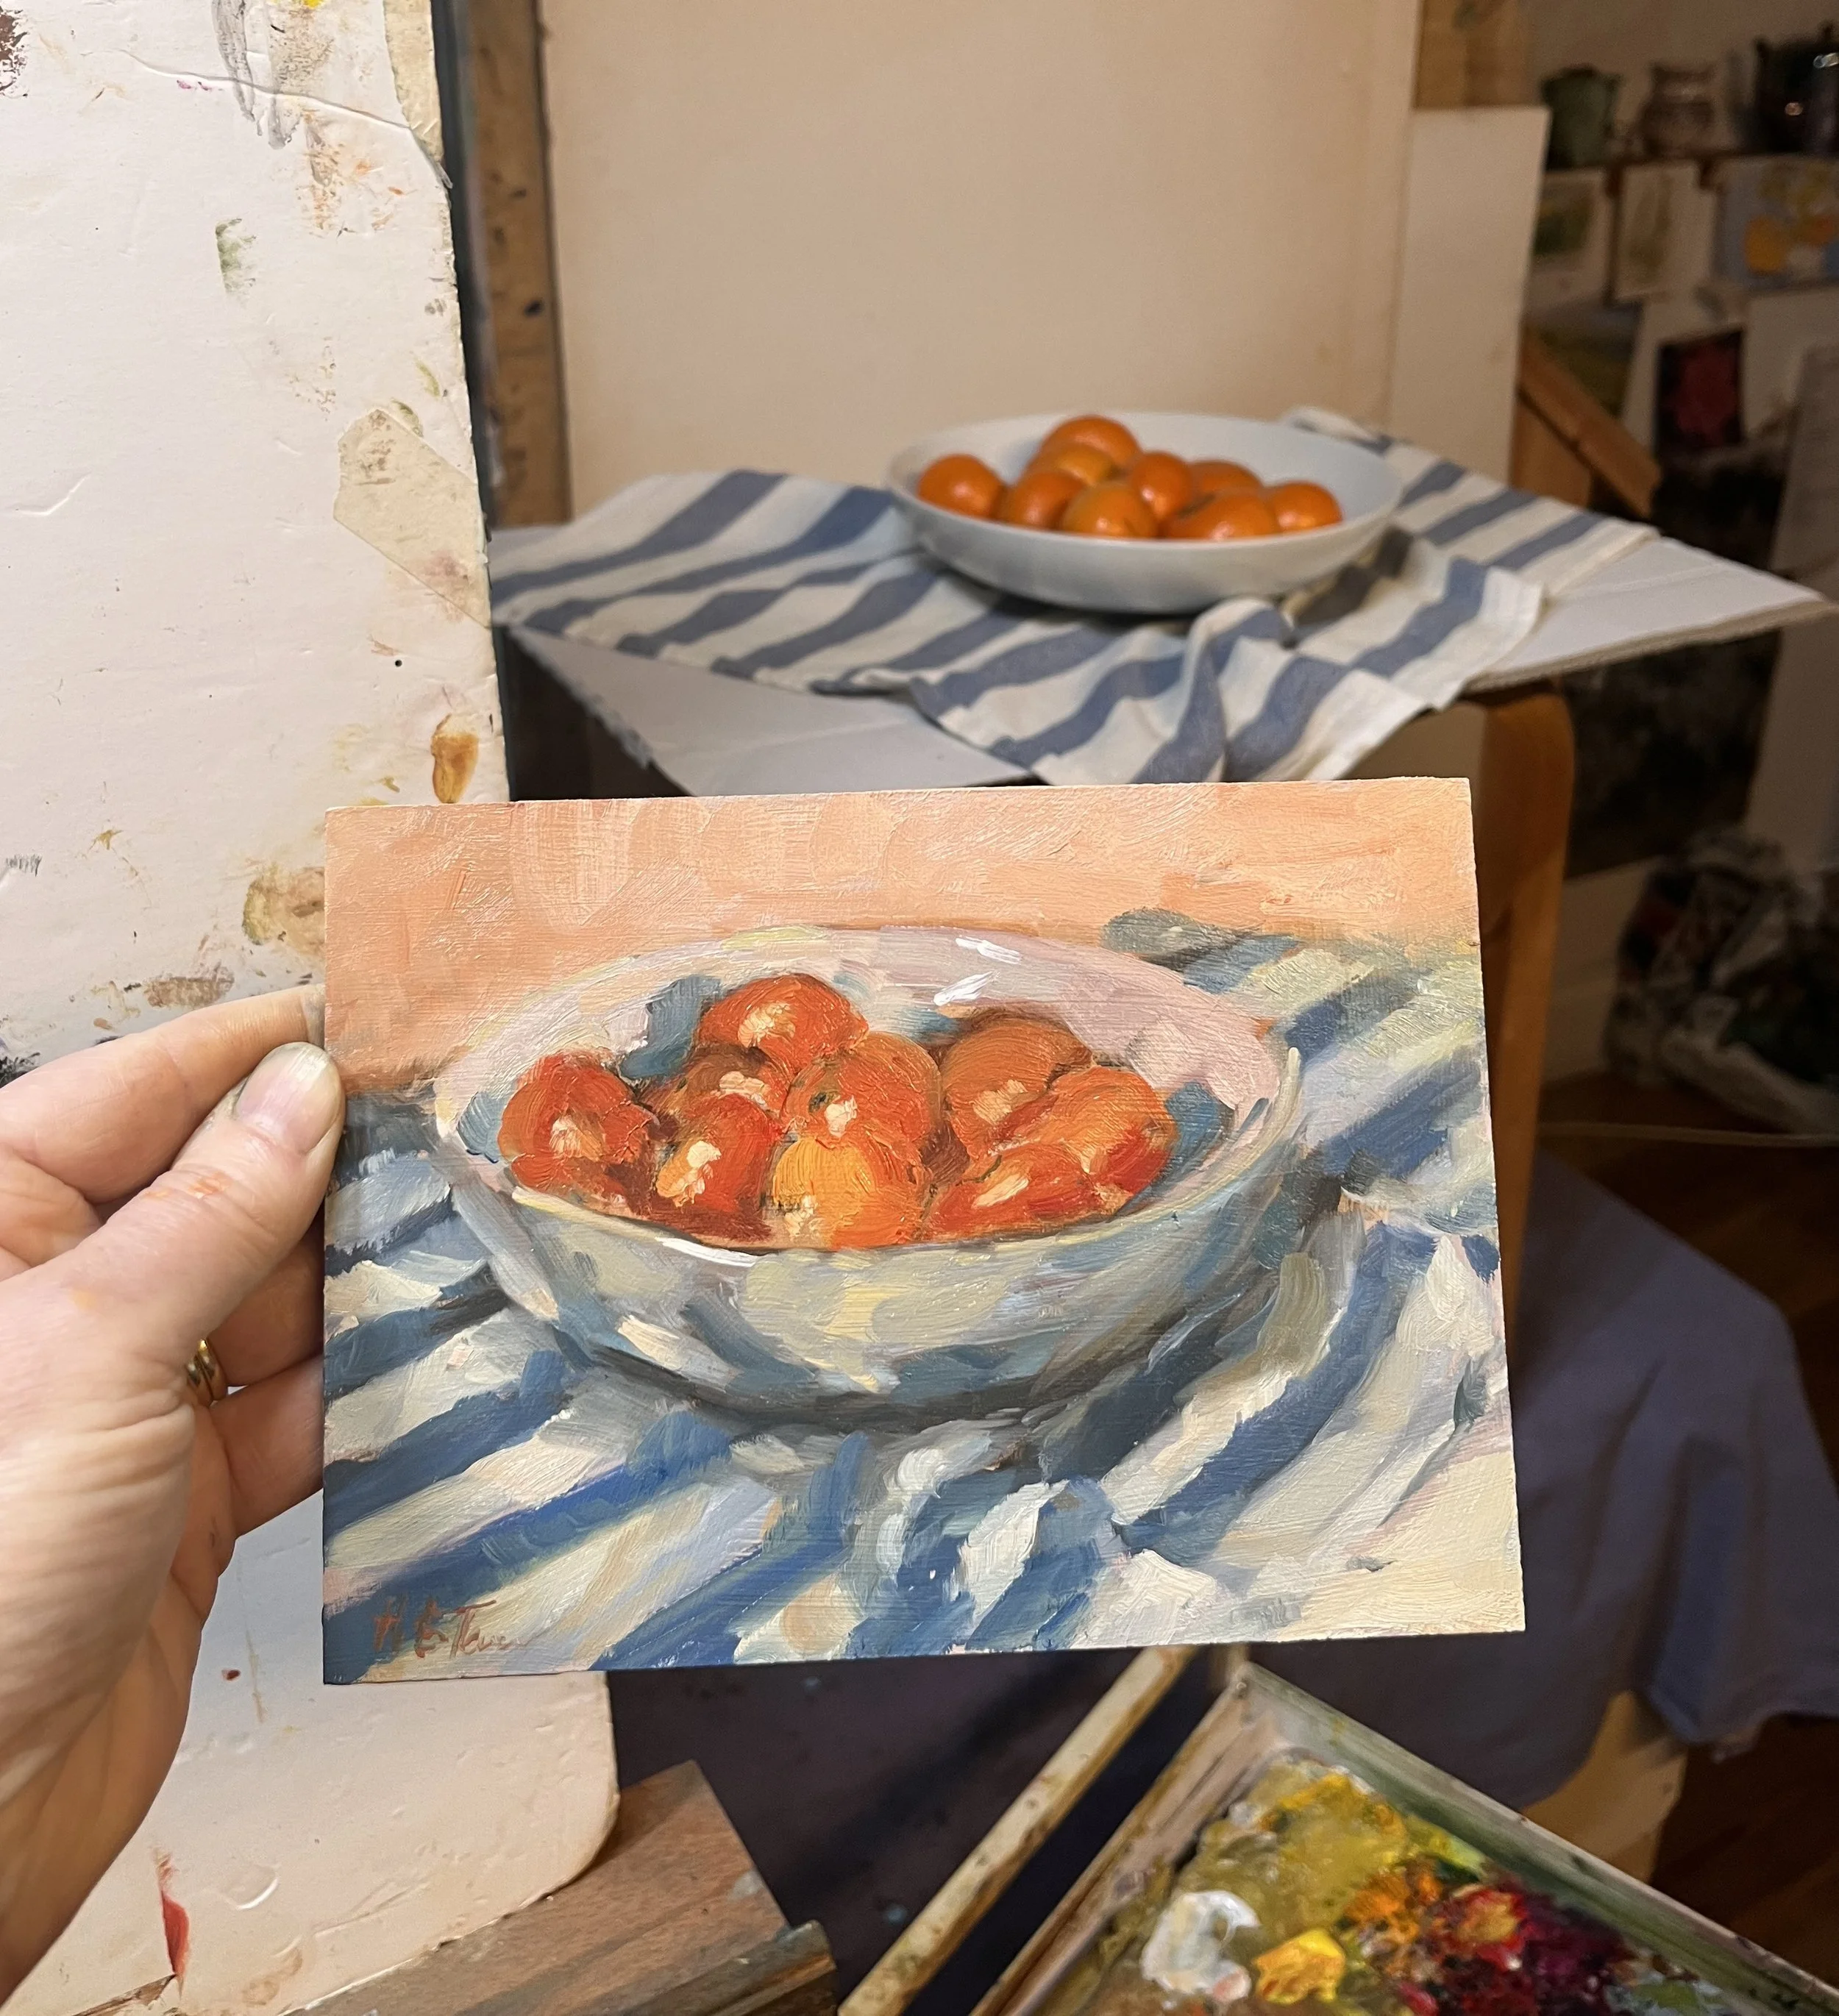
A little win at the end of the day
Tangerine Dreams, available via link in image
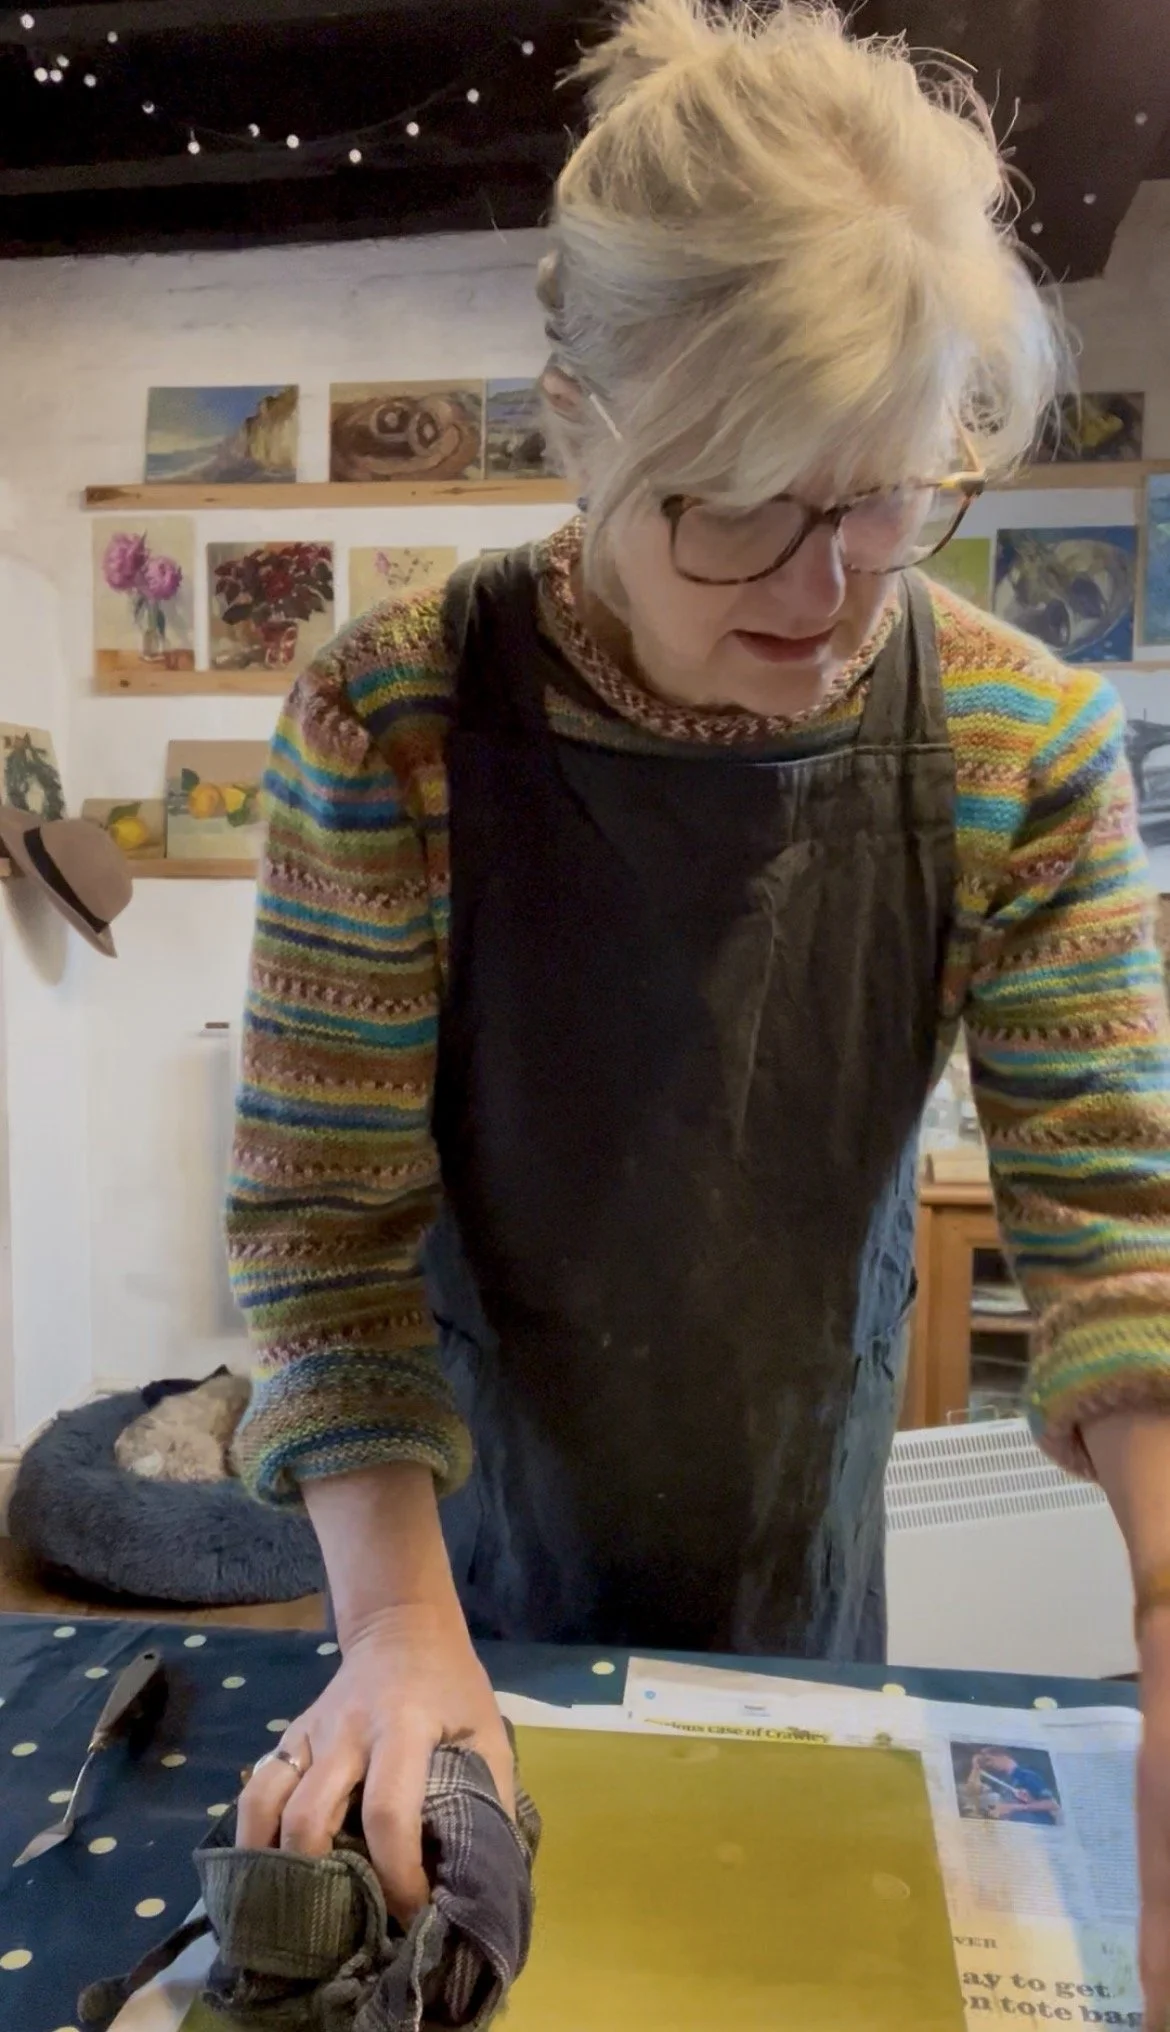
Busy with the wiping cloth of doom!
Tap on the image to watch my short YouTube video on how to deal with a failed painting